Monday, December 14, 2015

Amazing Snickerdoodles

I made amazing Snickerdoodles tonight just by tweaking my old recipe. Fool proof! You must try them! These cookies are S.

Cookie Dough:
1/2 cup butter, softened
5 TBSP Gentle Sweet
1/4 tsp xantham gum...
1 tsp cream of tartar
1/2 tsp baking soda
1/8 tsp mineral salt of choice
1/4 tsp vanilla extract
1 large egg
1 1/4 + 1/8 cup almond flour
2 scoops on plan vanilla whey isolate protein


Topping:
1 TBSP Gentle Sweet
1 1/2 tsp cinnamon


Preheat the oven to 350 degrees. Cream your butter until whipped smooth. Add your gentle sweet and mix until smooth. Add the xantham gum, cream of tartar, salt and baking soda and mix until smooth. Add the vanilla and the egg and mix until smooth. Add the almond flour and it until fully incorporated. Do the same with the whey powder, blending after each scoop.
In a small bowl, mix the extra gentle sweet with the cinnamon. Then, I used my small pampered chef cookie scoop to scoop even balls of dough. Roll the dough balls in the cinnamon mixture and press the cookies flat with the heel of your hand. Bake for 8 minutes. Remove from cookie sheet to rack to cool immediately.
This recipe made exactly 30 cookies using the small pampered chef cookie scoop. I would say between 2 and 4 cookies is a comfortable serving size.

Wednesday, June 17, 2015

Lemon Blueberry Cupcakes with Blueberry Cream Cheese Frosting

This morning, I was inspired to create in the kitchen so I made myself this breakfast. It was wonderfully delicious and satisfying. I sautéed some baby kale in butter and garlic and topped it with 3 over easy eggs and 4 strips of bacon. It was SOOOOOOOO good!


After breakfast, I decided I wanted to bake something delicious but healthy to share with the family after dinner. I am not really a cupcake person. I don't really like frosting. I would much rather have a cookie, a warm brownie, a milkshake or sundae, etc. I do love pound cake but, I did not want to wait that long. I used to make an awesome blueberry lemon pound cake before I went grain free and sugar free so I decided to try something along those lines. I used the THM Baking Blend in place of my flour and it worked great. I also didn't want people to say that I put frosting on blueberry muffins so, I made a filling out of the blueberries and it created a layered effect. I put 2 Tbsp of batter in each cupcake liner and then a teaspoon of the filling and then topped it with 2 more Tbsp of batter. Here are my cupcakes with the filling but before I covered them over. I was just going to make a cream cheese frosting with vanilla and stevia but, I had leftover filling and so I just mixed it into the softened cream cheese. It is amazing frosting!


Here is my finished product. My husband said that he couldn't tell that it was not a junk food cupcake and they were so moist.


These are an S treat if you follow THM. They are low carb, sugar free, and high protein. Here is the recipe:

Lemon Blueberry Cupcakes with Blueberry Cream Cheese Frosting

Preheat the oven to 350 degrees and either grease a 12 muffin pan or use cupcake liners like I did. Prepare the filling by blending everything in the blender until smooth.

Filling:
1/4 cup + 1/8 cup frozen wild blueberries, thawed (I used Trader Joe's organic wild blueberries)
2 TBSP xylitol (I used Xyla)
2 doonks pure stevia extract (I used NOW Organic Better Stevia)
1 TBSP Butter, melted (I used Kerrygold)

Blend and set aside. Next, add all your ingredients to a large bowl and mix with a hand mixer until smooth.

Cupcake Batter:
1 cup xylitol (I used Xyla)
1/3 cup butter, melted (I used Kerrygold)
1/2 cup unsweetened vanilla almond milk (I used Silk)
6 TBSP carton egg whites or 2 egg whites or 1 egg and 1 TBSP egg whites (I used Just Whites)
2 TBSP lemon juice (bottled or fresh is fine)
1 tsp pure lemon extract (I used McCormack)
2 tsp aluminum free baking powder ( I get a giant one at Sam's Club)
1/4 tsp of sea salt or pink Himalaya salt (I used the pink from Trader Joe's)
2 cups of THM Baking Blend
1/2 cup pureed yellow summer squash (steam it, blend it and measure out 1/2 cup)

Blend it all until smooth and fill each cupcake liner with 2 level TBSP of batter. Then, put a small dollop of the filling in the center of each cupcake. I used a small iced tea spoon. It was probably no more than 1 tsp measured. Then, top each one off with 2 more level TBSP of the batter. If there is any batter left over, distribute it evenly among the cups. Bake for 20 to 30 minutes or until they are golden around the edges and the tops spring back slightly. Mine took the full 30 minutes so just start checking at 20 minutes and bake until golden.  They should not be completely golden . . . just on the edges and little peaks. Remove them from the pan to cool on a cooling rack. Let them cool completely. OR . . . if you are impatient like me, place your cooling rack in the freezer for 30 minutes. While they are cooling, make the frosting.

Frosting:
8 ounce brick of cream cheese, softened (I used full fat)
the rest of the blueberry filling (You should have enough left to make a nice lavender frosting)

Mix by hand or with a mixer and frost the cupcakes. You can always taste and add sweetener to the frosting but mine did not need it.  Enjoy!

***NOTES . . .

I store them in the fridge because they are so good cold and because of the cream cheese frosting.

This recipe makes 12 regular sized cupcakes. The nutrition information is based on the exact ingredients I used and the exact measurements.

Each cupcake has: 168 calories, 14.6g fat, less than 1.9g net carbs and 6.3g protein.

Wednesday, June 3, 2015

Accidental Carb-Free Sweetened Condensed Milk and Stracciatella Cookies!!!

OK, so last night I was trying out this low carb candy recipe I saw on my newsfeed on Facebook. I didn't save it and I can't remember where it was from but, I ALWAYS change recipes based on what I have in my pantry and what I know to be suitable subs. It was supposed to be orange flavored . . . mine was butterscotch. Anyways, after changing this recipe around on paper, I made it and the candy mixture seized up on me and turned into this clumpy, sticky mess. It tasted good but, I couldn't get it into molds or even spread into a pan. It was like if you wait too long to get the hot Rice Krispie mixture into the pan. My husband was like, "What is that? It looks like baby spit up!" Hey! Thanks for the input, Hon! I could not salvage it, so into the trash it went. BUT . . . the taste reminded me of a cross between marshmallow fluff and sweetened condensed milk with the texture of sweetened condensed milk. So I started over and left out the ingredient that I was sure had caused the awful clumpy mess in the trash. Here is what I got! Beautiful, no?
 

Just so you can see how it flows. It is truly a syrup, sticky texture but smooth and delicious!


Here is what I did:

I poured 1/3 cup + 1 TBSP boiling water into the single serve cup of my Ninja.

I added 2 TBSP salted butter and 2 TBSP unsalted butter I added 1/8 tsp LorAnn Oils butterscotch flavor. If you use regular extracts, use 1/2 tsp. Also, be creative and use whatever flavor you want!!! I give you permission! LOL! I blended all this together until smooth.

Then I added 3 TBSP THM Sweet Blend (You may have to convert if you are using a different sweetener. They have a conversion chart on the THM website.).

I also added 1 measured cup of Vanilla Whey Protein Isolate (I used Jay Robb - 3 scoops). Blend until smooth and pour into a covered container and keep it in the fridge. It makes 1 and 1/2 cups. Per TBSP it has 31.7 calories, 1.9g fat, 0 carbs and 3.1g protein

I used this in my iced coffee this morning. It was delicious! One of the ladies on the THM Facebook page made a pin for the sweetened condensed milk. You can find it here.

So . . . all that to say . . . I used it to make these awesome cookies.  I am calling them Stracciatella Cookies because they look like Stracciatella gelato and the flavors are very similar.  See . . . doesn't the dough look like Stracciatella gelato???


I used my Pampered Chef small cookie scoop to scoop the dough onto a parchment lined cookie sheet and flattened them with my fingers.


I baked them at 350 degrees for exactly 8 minutes. They were perfect!


I love how perfectly they browned on the bottom.


Isn't it pretty??? I ground up 1/2 cup of Lilly's Chocolate Chips to make these pretty chocolate flakes throughout.


Yum !  NOT cake-y at all! They actually have a crispy, buttery outside.  They are a great dunking cookie because they are not gooey inside and they soak up you beverage of choice.


My taste testers loved them!


So here is the recipe for Stracciatella Cookies.
They are and S treat if you follow THM.
They are low carb, sugar free!

2 sticks unsalted butter, room temperature

Whip until light and airy.

1/2 cup homemade sweetened condensed milk from above
1 TBSP Pure Vanilla Extract
1/2 tsp sea salt
1 Tbsp baking powder
2 Tbsp THM Sweet Blend

Blend until it is all smooth and incorporated.

1 1/2 cups THM Baking Blend

Blend until incorporated.

1/2 cup Lilly's chocolate chip pulsed in the blender to make chocolate dust

Stir in with a spoon and scoop with a cookie scoop onto your parchment lined baking sheet. Flatten with your fingers and bake at 350 degrees for 8 minutes. Enjoy!

NOTES:
* My husband said they reminded him of Pecan Sandies. They are buttery and crisp on the outside and porous on the inside making it a great dunking cookie.

* You can just make these as chocolate chips but, then you can't called them Stracciatella Cookies. LOL! * If you use salted butter, leave out the sea salt or these cookies will be too salty.

Friday, May 8, 2015

I am doing a Fuel Cycle and . . . FP Waffles!!!

As some of you may know, we have been on THM since July 29, 2013.  We slimmed down pretty quickly with no exercise which was very encouraging.  We also starting feeling better within the first week.  No acid reflux, joint pain, fatigue, etc.  Then in January, we felt like we were finally able to add exercise.  It was very hard at first but we made it a lifestyle change.  Just like we will never go back to eating foods that act as a poison to us, we will never stop having a lifestyle that includes physical fitness and regular exercise.

I had no clue what my goal weight should be but, I figured I would just see how things progressed and figure it out as I got closer.  Well, I am much heavier than I look.  By May of 2014, I had shrunk from a tight 16 ( I refused to shop in the plus size department.  Like that meant I wasn't plus size!  I was squeezing my fat body into the top "regular" sized clothes and trying to convince myself that I was not as big as I was.) down to a comfortable 4 . . . even in designer labels!  How could this be?  I was at my wedding weight (150 pounds at 5'4") but, I had never been a 4 before!  By October of 2014, I had hit my lowest weight or 139 pounds.  I wear a size 4 (a 2 in some clothes).  I have toned up but, according to the BMI charts, I am just into the healthy range.  That is a win but, it makes me feel like my weight is still high for my height.  However, how much smaller can I get?  Now I just focus on fitness goals.  If my weight goes up, then the number goes up!  But I know I am healthier and building muscle so weight is just a number. But, it took me a long time to be good with this idea. 

Once I felt like I had hit my goal size/weight, I started to allow myself to have healthy crossover meals every once in a while to maintain where I was and since I was exercising, they were not affecting my weight at all.  BUT . . . I got comfortable with healthy crossovers and even though I was still exercising, I was doing more of them than I should.  So I decided to reboot myself and do a fuel cycle to get things back on track.

I love S meals and do them more than E meals.  I am one of those that finds that E meals leave me starving an hour later and 2 pounds heavier the next day.  I do not do E meals but, I will do E snacks about once a day.  It is usually a smoothie, shake or fruit and protein.  We also do not eat grains for health reasons so E meals and snacks are more difficult for me.  But I still get those E snacks in for a change of fuel.  Some times I will just make a light S meal a crossover to get some healthy carbs in.

I just finished up the first 3 days which are Deep S days.  It was harder than I thought it would be.  I didn't realize how much I relied on dairy and nuts and seeds.  BUT I was deliberate and diligent to make sure I was eating enough and getting enough protein and really making sure to load on the healthy fats.  This morning was my first FP day.  It felt good to have a waffle this morning!  LOL!  It was really good.  I used this recipe but, I left out the coconut oil and used the THM brand baking blend and added some butterscotch extract to the batter.  http://homeschoolingaadventures.blogspot.com/2014/10/waffle-for-one.html#.VU0AqP50yUl

I also don't really like syrup so I made a topping of frozen strawberries, cream cheese and xylitol and blended it until smooth and used it as a dipping sauce.  The cream cheese was why I left the coconut oil out of the waffle.  It was so good and so worth it and it fell under the confines of FP. I also measured it out so I wouldn't go over on fats.  SO GOOD!  Here is a picture of my breakfast!  YUM!


For my snack after my workout, I had a shake made with:
1 cup of unsweetened vanilla almond milk
70 grams frozen berry medley
2 TBSP xylitol
Splash of vanilla
Pinch of salt
1/2 tsp gluccie
1 scoop of THM approved Vanilla Whey Isolate
Handful of ice cubes

It was super good!  I will update again at the end of the Fuel Cycle and let you know my progress.

Sunday, April 26, 2015

Crispy Grain-free, Sugar-free Cookies

Many of you know that grain-free and sugar -free baking can be a little tricky. Nothing bakes quite like wheat flour. Pretty much everything I have made since changing our lifestyle almost 2 years ago has tasted great. The texture has left much to be desired. It is kind of frustrating when you want the edges and bottom of your cookies to be crisp but the middle warm and chewy. I have eaten many a very tasty "cookie" with a spoon off a plate because it was either too crumbly or almost liquid inside. Well, today after much trolling on pinterest and almost 2 years of trial and error, I think I have done it! A cookie that is crispy on the outside and chewy on the inside! My tribe loved them. Here is a picture of the dough rolled into balls.


Then I flattened them with the heel of my hand.


These were halfway through baking.


These are done. Nice and golden.

 
See the bottom! Golden and crisp!

 
Here is a cross-section!

If to follow THM, these are S.

Crispy Chocolate Chip Cookies

2 cups raw cashews

Process the cashews in the food processor for a while . . . until it is warm and smooth and turns into cashew butter. Transfer to a bowl and add the following:

1/4 cup Nature's Hollow Xylitol Honey
1 Tbsp Vanilla Bean Paste (be sure it doesn't have sugar in it . . . some brands do. I make my own.)
3/4 tsp maple extract (I use Frontier brand organic.)
1/4 tsp sea salt
1 tsp baking soda

Mix these ingredients with a hand mixer and then add the next ingredient a little at a time until you get a dough that is stick but not gloopy. It may stick to your hands a bit but, it should come together as a solid ball of dough.

Vanilla Whey Isolate Protein Powder (I used Jay Robb.)

Then fold in with your hands whatever mix-ins you like: chopped nuts, sugar-free chocolate chips, etc. I used 1/2 cup of Lilly's Chocolate chips. Then I used my small Pampered Chef cookie scoop to make dough balls. It was very sticky so every 3 or so scoops, I sprayed my scoop with coconut oil spray. I flattened the dough with the heel of my hand and baked at 350 degrees for 8 minutes or until golden.

Let me know what you think.

Monday, March 30, 2015

Pumpkin Blondies!

These Pumpkin Blondies were an experiment that turned out very well. They are low carb, high protein and full of good fats. They are grain free, sugar free and nut free too for all of you who have nut allergies. If you follow Trim Healthy Mama, these are an S treat.

They were so moist, you would never know they were not made with regular wheat flour.

So, anyway, some of the ladies on Facebook were asking me to post the recipe here to my blog so they can pin it. So here you go, ladies! Pumpkin Blondies (S) 1 15 ounce can pumpkin 1 cup brown sugar (I used Just Like Brown Sugar but you can use 1 cup of sweetener of choice with 1/2 tsp yakon syrup or black strap molasses) 4 eggs 2/3 cup melted coconut oil 1 tsp of vanilla extract 3 tsp baking powder 1/2 tsp sea salt 1/2 cup vanilla whey isolate 2/3 cup coconut flour Handful of on plan chocolate chips to sprinkle on top Preheat oven to 350. Spray a 9x13 inch pan with coconut oil cooking spray. Mix the first 7 ingredients together until smooth. Add the protein powder and blend until smooth. Then add the coconut flour and blend until smooth. Let it sit for 5 minutes. Pour into prepared pan and bake for 30 to 35 minutes or until a toothpick comes out clean. Makes 18 thick squares. 133 calories, 10.5 grams of fat, 2.9 grams net carbs and 4.5 grams of protein per square

Monday, September 15, 2014

Chocolate Chip Cheesecake Cookies!!! YUM!!!

I love to lurk on Pinterest and blogs reading and pinning recipes.  I also love cookbooks.  I collect them and I read them cover to cover.  Here's the thing . . . I almost NEVER make the recipe exactly as written.  I have been cooking and baking a long time and I know what my family likes and what they don't.  I also have learned to substitute ingredients and have found that I sometimes like the sub better than the original.  Since July 29, 2013, I have adapted my fair share of recipes to suit our new lifestyle.  There is a LOT of material out there on grain free and sugar free recipes but, I have never found one that was perfect for my family as it was.  I am always tweaking.  This is a recipe that is sort of the love child of a cookie recipe from an old, stained church cookbook and the skills I have learned over the past year or so adapting recipes.  I have used this cookbook for as long as I have been able to cook alone.  The copyright is 1981!  As you can see, it is well used and well loved!


This is the recipe that I used to make a lot.  It was submitted by Ida Ropiecki.  Sister Ida was old when I was little but, I remember her being a very sweet lady.  She always brought really tasty desserts to church functions.  I have never really been a "nut in my dessert items" kind of girl but, these cookies were so good.


My crew really only ALWAYS wants chocolate chips in EVERYTHING . . . So, here is what I did to get what you see in the picture below.  I call them "Chocolate Chip Cheese Cake Cookies" or "C to the 5th"!  Sorry!  Cheesy teacher humor!  Back to the recipe!


 8 oz 1/3 fat Philadelphia cream cheese, softened
2 Tbsp salted butter, softened
1 Tbsp natural peanut butter

I put these in a large bowl and because I am impatient and didn't want to wait for them to soften, I took my cold ingredients and nuked them for 30 seconds in the microwave.  I whipped them together with my hand mixer and added:

1 cup xylitol
1 tsp pure vanilla extract

I whipped these until all was incorporated and fluffy . . . maybe a minute.  Then I added:

3 eggs

I mixed after each egg and as I mixed, the batter got fluffier.  Then I added:

1/4 tsp sea salt (you could add more if you use unsalted butter but, I used salted.)
1/2 tsp xantham gum
1 tsp baking powder
2/3 cup almond flour
1 scoop (1/3 cup) vanilla whey protein powder (I used Jay Robb.)

I mixed it all together being careful to get all the almond flour lumps smoothed out.  Then I added:

2 cups sugar free chocolate chips!!!  ((GASP!!!))

I know that's a lot but, my motto is "Go BIG, or Go home!"  We went big!  I mixed these in with the spatula and stuck the bowl in the fridge while I preheated the oven to 350 degrees.  The batter is just that . . . a batter.  It is super soft and needs to be chilled or it will spread really quickly.  10 minutes does the trick.  I lined a cookie sheet with parchment paper and used my small Pampered Chef cookie scoop to scoop even balls of batter onto the sheet.  I baked for 15 minutes (or until the edges are golden).  I let them cool a few minutes on the sheet before I transferred the cookies to the counter to finish cooling.  I got exactly 50 cookies from this recipe but, the last 2 cookies were larger than the rest of them.  Here is a close up!  It looks like a chocolate chip cookie but . . . one bite reveals the lovely taste of cheese cake!  What a happy surprise!

Each cookie has 50 calories,  2.5g fat, 0.6g net carbs and 1.3g protein.  If you follow THM, these cookies are S!  I ate 3 while I was baking them!  Don't you wish your cookie looked just like this?!  Go!  Make these NOW!!!


Just a few notes:
* I like 1/3 fat Philly because there is no carrageenan and it has the lowest carbs.
* You could do half chocolate chips and half chopped nuts of some sort but . . . why?
* I wanted these to be soft.  They are the consistency of Soft Batch cookies from Keebler.  The original cookies are dense and the recipe calls for 2 cups of flour and 1 cup of nuts.  I cut back on the butter and added an extra egg.  I used a total of 1 cup of dry ingredients (2/3 cup almond flour and 1/3 cup whey protein powder).  Protein powder (much like coconut flour) will soak up moisture in a recipe.  You can always add but, you can't take away, so if you want a denser cookie, go with 1 cup of almond flour and 1 scoop of whey.  Mix it and check your consistency.  Then, add your extra whey a tablespoon at a time until the batter looks right to you.
ENJOY!!!

Monday, September 8, 2014

A New Cookie Recipe aka "I am a Freakin' Genius!!!"

Every Sunday night I make a batch of healthy treats to last us the week for lunches and snacks so we don't get off track.  I usually make a batch of protein brownies and protein blondies, cut them into squares and wrap them individually.  I wanted a change so I was thinking cookies!  So, I started rummaging through the cabinets, pantry, fridge and freezer.  I found a bunch of partial bags of different nuts in the freezer . . . you know . . . ends of bags that are not enough for any one recipe.  So I dumped them into the food processor.  I had black walnuts, pecans, almonds, sunflower seeds, and  hazelnuts.  I pulsed until they were finely chopped but not quite "meal" consistency.  Then I added maybe 1/2 a cup of unsweetened shredded coconut and a couple of TBSP of dried goji berries.  I pulsed again until everything was consistent.  I ended up with exactly 2 1/2 cups of this mixture.  I set it aside and kept on rummaging.

I came across this peanut butter in the cabinet that I had bought at Trader Joe's.


So, in case you haven't noticed already, these are going to be S cookies (if you follow THM).  I set aside the peanut butter and got out all the usual cookie ingredients.  You know . . . butter, eggs, baking soda, vanilla extract, xylitol, Just Like Brown Sugar, etc.  I softened 1/2 a stick of butter in the microwave and added 3/4 cup each xylitol and Just Like Brown Sugar and I mixed it with my hand mixer until it was light and fluffy.  Then I added 2 eggs, a pinch of sea salt, 1 1/4 tsp baking soda, 1 tsp maple extract and 2 tsp vanilla extract.  I blended all of that together until smooth.  Then I dumped in 1 cup of my special peanut butter and thought, "Hey! Cinnamon would be good!"  So I added 1 tsp of cinnamon to the batter and blended.  Then I tasted it batter and it was pretty darn tasty so I dumped in my 2 1/2 cups of nut mixture that I had made and blended.  It was still pretty loose so I added 1/2 cup golden flax meal and mixed.  It was still not quite the right cookie dough consistency, so I added another 1/2 cup of golden flax meal.  This is what it looked like.  Pretty, right?


Then I decided to add some chocolate chips because second only to bacon, chocolate makes everything better!  So I added 6oz of sugar free chocolate chips.  Not that many . . . see?  I also used my small cookie scoop to get evenly sized cookies.


I scooped them onto a parchment lined baking pan and baked in a preheated, 350 degree oven for 10 minutes.  I also flattened them a little with the palm of my hand before I put them in the oven so we would not get golf ball cookies.


They only needed 10 minutes.  The edges were slightly golden and the tops were set.  I let them cool a couple of minutes on the pan before moving them to the counter.


They were soft and slightly gooey in the middle with a very light crisp around the edges . . . just like a good homemade cookie should be!  They tasted like oatmeal cookies.  They were nutty and sweet from the goji berries and coconut shreds but, they weren't chunky because I had processed everything semi-finely before hand.  You can see how small the nuts and seeds were in the picture below (after I took a bite).  My husband thought they were the old oatmeal cookies I used to make.  I must say, they were very good and hard to tell that they weren't a sinful treat!

I have been trying to come up with a clever name for these cookies and I have decided on . . .
wait for it:

"SHUT UP!!! THESE ARE HEALTHY COOKIES???"

Long and obnoxious, I know, but . . . I thought it was a good title since they taste AMAZING and have TONS of protein, fiber, healthy fats and NO JUNK!  I also thought it was better than Michael's suggestion of:

"FREAKIN' AWESOME COOKIES"

What do you think we should call them? Try them and then let me know! Here is the recipe all in one place:

1/4 cup softened butter
3/4 cup xylitol
3/4 cup Just Like Brown Sugar

Mix until light and fluffy. Then add:

2 eggs
1 1/4 tsp baking soda
a pinch of sea salt
1 tsp cinnamon
1 tsp pure maple extract
2 tsp pure vanilla extract

Blend until smooth and add:

1 cup peanut butter

Blend and add:

2 1/2 cups finely ground nut/coconut/goji mixture
1 cup golden flax seed meal

Mix well and add in (optional):

6 oz sugar free chocolate chips

Bake at 350 degrees for 10 minutes on a parchment lined baking pan. This recipe makes 5 dozen cookies.  Enjoy!

Tuesday, September 2, 2014

Labor Day Update and Red Velvet Cake for Breakfast!

Happy Labor Day! Today was a lazy day here at The Temple of Adventure. We all slept in and then we pretty much just hung out around the house. It was a nice change from the craziness of the last 2 weeks. So here is my update, I am down a total of 67 pounds and 51.25 inches overall. I still have some areas I want to tone but, I am working on that on Tuesdays, Thursdays and Saturdays with my trainer. Donna is awesome and I never thought I would be able to do the things that I can do now. It is really amazing. I have pretty much turned over my entire closet including shoes! I actually lost a size in my feet. It is super weird but, the doctor said it was normal for someone who has lost the equivalent of their 9 year old son to lose a shoe size. My rings are all too big and my new summer clothes that I bought at the end of spring are getting looser. I have had to move the seat closer to the steering wheel in the car. I guess my butt used to boost me closer to the wheel! LOL! The numbers make me happy but, all the non-scale victories make me even happier.  Because I have been strength training, I have been building muscle (which weighs more than fat) so even though I am smaller, I am heavier than I look.  Please, do not go by the BMI chart!!!  It doesn't take in consideration things like muscle mass and body type.  This is why the non-scale victories are so important.  According to the BMI chart, my BMI is 24.6.
The ranges are:
Underweight = 18.4 or less
Normal weight = 18.5-24.9
Overweight = 25–29.9
Obesity = BMI of 30 or greater
As you can see, at a BMI of 24.6, I am just barely into the "healthy or normal" weight range.  However, I wear a size 4 in jeans and a medium or small top depending on the brand.  Do I still have fat on my body?  Sure, I do.  I still have areas I am working on but, I don't know how realistic it would be for me to lose another 18 pounds.  Here is a picture from last Sunday just for fun!


Here is what you were really waiting for . . . Red Velvet Cake!!! This is a "Cake in a Mug". It is an S if you are on THM. It is grain/gluten free, sugar free and low carb. This is my cake after it came out of the microwave. I forgot to mention that it is also free of food dyes! Isn't it beautiful? I didn't make it in a mug.  I made it in a small Corningware crock so maybe we should call it "Crock o' Cake"!  LOL!  OK, I'll stop now.  BTW . . . I use this crock when making bread in a mug and it is the perfect size for hamburgers!


How, you ask, did I get my Red Velvet Cake so pretty and red without food dyes? With Cocoa Cardio! I love it! It has cocoa powder, beet juice extract and hibiscus extract in it.  I use it a lot.  I used it to make my Red Velvet Cake Batter Protein Shake.  That post has the link where you can purchase it on Amazon.


RED VELVET CAKE
So, here is how I made this:
I melted 1 TBSP of butter in my crock.
I added 2 TBSP of full fat sour cream to the melted butter and whisked it together until smooth.
I added 2 drops of SweetLeaf Vanilla Crème stevia drops.
(You can use regular stevia and a dash of vanilla extract but, I had this so I used it.)
I added 1 egg and whisked it all together.
Then I added the dry ingredients:
2 TBSP golden flax seed meal
2 TBSP almond flour
2 tsp CocoaCardio
(You can use plain cocoa powder and add red food coloring if you don't have this.)
1/2 tsp aluminum free baking powder
1 TBSP xylitol (or sweetener of choice)
a pinch of Celtic Sea Salt
 
Whisk all of it together until smooth and microwave for 1 minute and 30 seconds.  I made 2 of these for breakfast.  One for me and one for Michael.  It was so good!
 
CREAM CHEESE FROSTING
Oh yeah!  I forgot I made a quick frosting!
This recipe is for 2 cakes so if you are just making one, cut it in half.
4 oz of full fat cream cheese (softened in the microwave)
2 drops SweetLeaf Vanilla Crème stevia drops
(or regular stevia and a few drops of vanilla extract)
1 heaping TBSP of powdered xylitol (or sweetener of choice)
Whisk everything together until smooth and put half on one cake and half on the other!
Isn't it delicious looking?
 
 
MMMMMMMMMMMMM!!!!!!!!!  You know you want some!

 
Red Velvet Cake . . . the breakfast of champions!
BTW . . . this cake with frosting is a FAT BOMB!
686 calories, 51g fat, 7g net carbs and 20g protein!
MMMMMM!!!!   Diet Food!  LOL!


Tuesday, July 29, 2014

Marking 1 Year of a New Way of Life!!!

This is me. Hi! This was Christmas 2010. This is the fattest picture of me that I could find. I don't really even recognize this girl. She is smiling but . . . I know that she is dying to go home and take off that dress and peel off the Spanx that she is wearing underneath it that have surely left deep, painful, red grooves all over her lumpy, chunky body that she hates. Her hair is frizzy and her skin is blotchy. The smile is hiding A LOT! I went away to college in August of 1994 weighing 130 pounds and wearing a size 6 pants. I came home that Thanksgiving break wearing a size 12 pants! NOT GOOD! So, I made a commitment to exercise and I went vegetarian and I lost weight. This was the beginning of the Yo-Yo dieting that would be the next 19 years of my life. I tried everything. Weight Watchers Points, Deal A Meal, Fit For Life, Tae Bo, Walk Away the Pounds, the 6 Week Body Makeover, Visalus . . . And guess what? They all worked . . . as long as I stuck to it. But who can stick to some of those things all the time. And so the weight would come back and then some.  Also, during that time I had a baby, got married, moved to a new state, bought a house, had a second baby, lived on no income for 9 months, had a third baby, started homeschooling, started working at a school, became the administrator of the school, buried my grandmother, bought a new house while still owning the old one, finally sold the old one after 8 months of 2 mortgages . . . LIFE . . . you get the idea. During all this time, I cooked and baked from scratch, I joined a produce co-op. If it was healthy, I did it. Yet here I am at the end of 2010 . . . fat and unhappy and very unhealthy.


SO . . . It is after midnight, which officially makes it July 29, 2014. 1 year ago this very day, my husband and I decided to make a life altering change. In early July of last year, Michael told me that he thought he was having a heart attack and asked me to take him to the ER. He had just turned 38 years old. When we arrived at the ER, they took him back right away and did an EKG. Good news! His heart was perfect! Bad news . . . he was still in pain and they made us wait in chairs for 3 hours before putting us in a room. UGH! Well, when we finally saw the doctor and had blood work and a chest x-ray, we were told he had severe GERD (Gastro Esophageal Reflux Disease) or Acid Reflux. They gave him a GI Cocktail to numb his esophagus and neutralize the acid in his stomach. He began to feel better. Great! The doctor sat there and basically told us that there was nothing that could be done. Michael would have to take Prilosec for the rest of his life. He told us that losing weight might help and it was a good idea because he was overweight but, there was no guarantee that the acid reflux would get better. I knew that could not be right so . . . after returning home at 3 AM and sleeping in, I started scouring the web for answers from wherever I could find them. In the middle of all of this mess, a friend of my mom's had started changing her eating habits after reading a book called Trim Healthy Mama. My mom had bought the book also and was going to start making some changes and she suggested to me that it might help Michael and me to lose weight and be healthier. So, I ordered the e-book and I read the book in 2 days. I am a freakishly fast reader. I noticed that a lot of what I read in the book lined up with what I had read about healing the GI track and reversing GERD. Interesting! I am also a perfectionist so it was all or nothing for us. So, we jumped in on July 29, 2013 and have not looked back. I started doing this to help my husband and in the process found that it was something that would work for me as well. I lost 7 pounds the first week! Michael was also losing weight and after an initial 2 week course of Prilosec to get it under control, he has not had to take it again.  This is a picture of our family from the end of May 2013, right before we started our new way of life.  Aren't we cute?  Aren't dimpled elbows, kankels and Michelin Man rolls attractive on grown adults?  No?  Only babies?  Yeah, I know . . .

 
  Here is another picture . . . just for kicks and giggles. This was July 2012. We were SOOOOOO excited to drive all the way to Columbus, Ohio to see Michael's family and have portraits done with the whole family. We had lost 30 pounds each doing Visalus!!! Look how heavy we still were!!!  We can't even get close to each other because our bellies are too big!

Back to the story . . . we changed our lifestyle and weight melted off even over the holidays! I threw myself into figuring out how to make everything we liked "on plan". We had a ton of success with the scale but, we also had a LOT of NSV (non scale victories). Our middle son, who was a little chunky lost 8 pounds. I was not making the kids eat totally on plan but, it was a happy by-product. Our oldest son was able to come off his ADHD meds after 12 years! Our youngest became less hyper. We had more energy. My husband stopped snoring. I could wake up easier in the morning. I didn't need a nap in the afternoon anymore. I had to buy a WHOLE new wardrobe (including underwear). I had to get rid of some shoes which were mysteriously TOO BIG. I had to have a sales associate bring me a small to the dressing room because the mediums I had grabbed were too big! I can stand in one leg of my old shorts. My husband needed a whole new wardrobe. I have actually reversed tooth decay. My dentist was so happy. I tried on my sweet 16 dress from October 1993 and it fit! I go to the gym and lift weights I never thought I would be able to lift. There are so many more things but, I just can't list everything! All this to say . . . we have changed our lives . . . we are never going back. We have learned a lot about ourselves. We have customized THM to fit our lives and our bodies. For example. I found out pretty quickly that E meals did not cut it for me. I tried. I would make this great meal and make sure it was E. I WAS STARVING AN HOUR LATER! AND . . . I would be 2 pounds heavier the next day. So, like Pearl and Serene say in the book, you have to listen to your body. Along the way we learned what foods triggered acid reflux attacks and cut them out. I stuck to S and FP and had great success. My husband however, does better with an E breakfast and an S dinner so that is what he does. We are completely sugar free. We don't eat rice, potatoes, corn, or grains (except oatmeal for Michael). That is what has worked for us. We are happy. We are NEVER hungry. We never feel like we are on a diet. We are more fun now. So here I am again . . . I have lost 64 pounds and 50+ inches. I have gone from a tight 16 to a 4 in pants and skirts. I have gone from XL shirts to Smalls and Mediums. The dress I am wearing in the picture is an 8. BUT . . . the girl in this picture is not wearing Spanx under it!


See the difference in the hair and skin and lack of chins? LOL! That is naturally curly and now healthy hair and healthy, radiant skin because I am healthy on the inside.


So, HAPPY 1 YEAR ANNIVERSARY, Honey!  Michael has lost 50+ pounds and has gone down in his clothes as well.  I am so proud of him.  He does not like change so this was not easy for him.  However, he likes pain even less than change so . . .  Here is a picture of Michael and our boys.  That t-shirt was tight on him when he got it.  You can really tell a difference.  You might have to click on the picture to see it better.


We are still a work in progress. Neither one of us is were we need to be yet but, we are miles away from where we were a year ago. I hope that our story encourages someone. Feel free to contact me if you have any questions. We all need to help each other.

Stay tuned! I plan on posting some of our favorite recipes and fun stuff like that.

Tuesday, March 18, 2014

Red Velvet Cake Batter Protien Shake

So, it has been a really long time since I posted on my blog.  So much has happened since my last post.  We sold our home and bought a house in town.  It is closer to everything and we really love it.  I will have to post pictures soon.  We did a lot of work before we moved in and I have a tone of pictures of all of that.  We moved in at the end of April so it has almost been a year in our new home. 

Over the summer, we changed our eating habits . . . drastically.  I have so far lost 43 pounds and My husband has lost 50.  I will post more about our journey soon but, people have been asking me for the recipes for some of the protein shakes I make.  The other day I made a Red Velvet Cake Batter Protein Shake that was absolutely amazing.  I took inspiration from this shake that I had found on Pintrest.  It is very good.  I tweaked it a bit and I added this amazing product to get the cocoa flavor and the red color with out all the bad for you food dyes.  So here is the recipe.  I hope you enjoy it as much as we do.


Red Velvet Cake Batter Protein Shake

Load the following ingredients into your blender and blend well for 30 seconds or so:
1 cup unsweetened vanilla almond milk (I use Silk brand as it doesn't contain Carrageenan)
¼ cup cottage cheese (I use Friendship 1% as it doesn't contain Carrageenan)
⅛ tsp Celtic sea salt
¼ tsp baking powder (aluminum free)
⅛ tsp butter extract
⅛ tsp pure almond extract
1 tsp pure vanilla extract
2 TBSP xylitol (I use NOW Foods brand non-GMO)
1 scoop Cocoa Cardio
1/2 tsp Gluccomannan
 
Add crushed ice to your blender to the 4 cup line and blend again until it is nice and smooth and slushy.
 
Add 1 scoop of a good quality whey protein isolate.  I used Jay Robb chocolate protein powder.  Blend until all your powder is mixed in and your mixture fluffs up to about the 7 cup line.
 
This makes 1 super big serving and is a nice filling breakfast.  Sometimes I will split it with my hubby after a workout.  Sometimes we split it 4 ways among the kids as a "milkshake" treat.  Here are the nutritional facts: 275 calories, 3g fat, 4g net carbs and 36g protein
 
It is packed with protein, low fat and low carb.  If you are THM, this counts as a Fuel Pull.

Friday, July 27, 2012

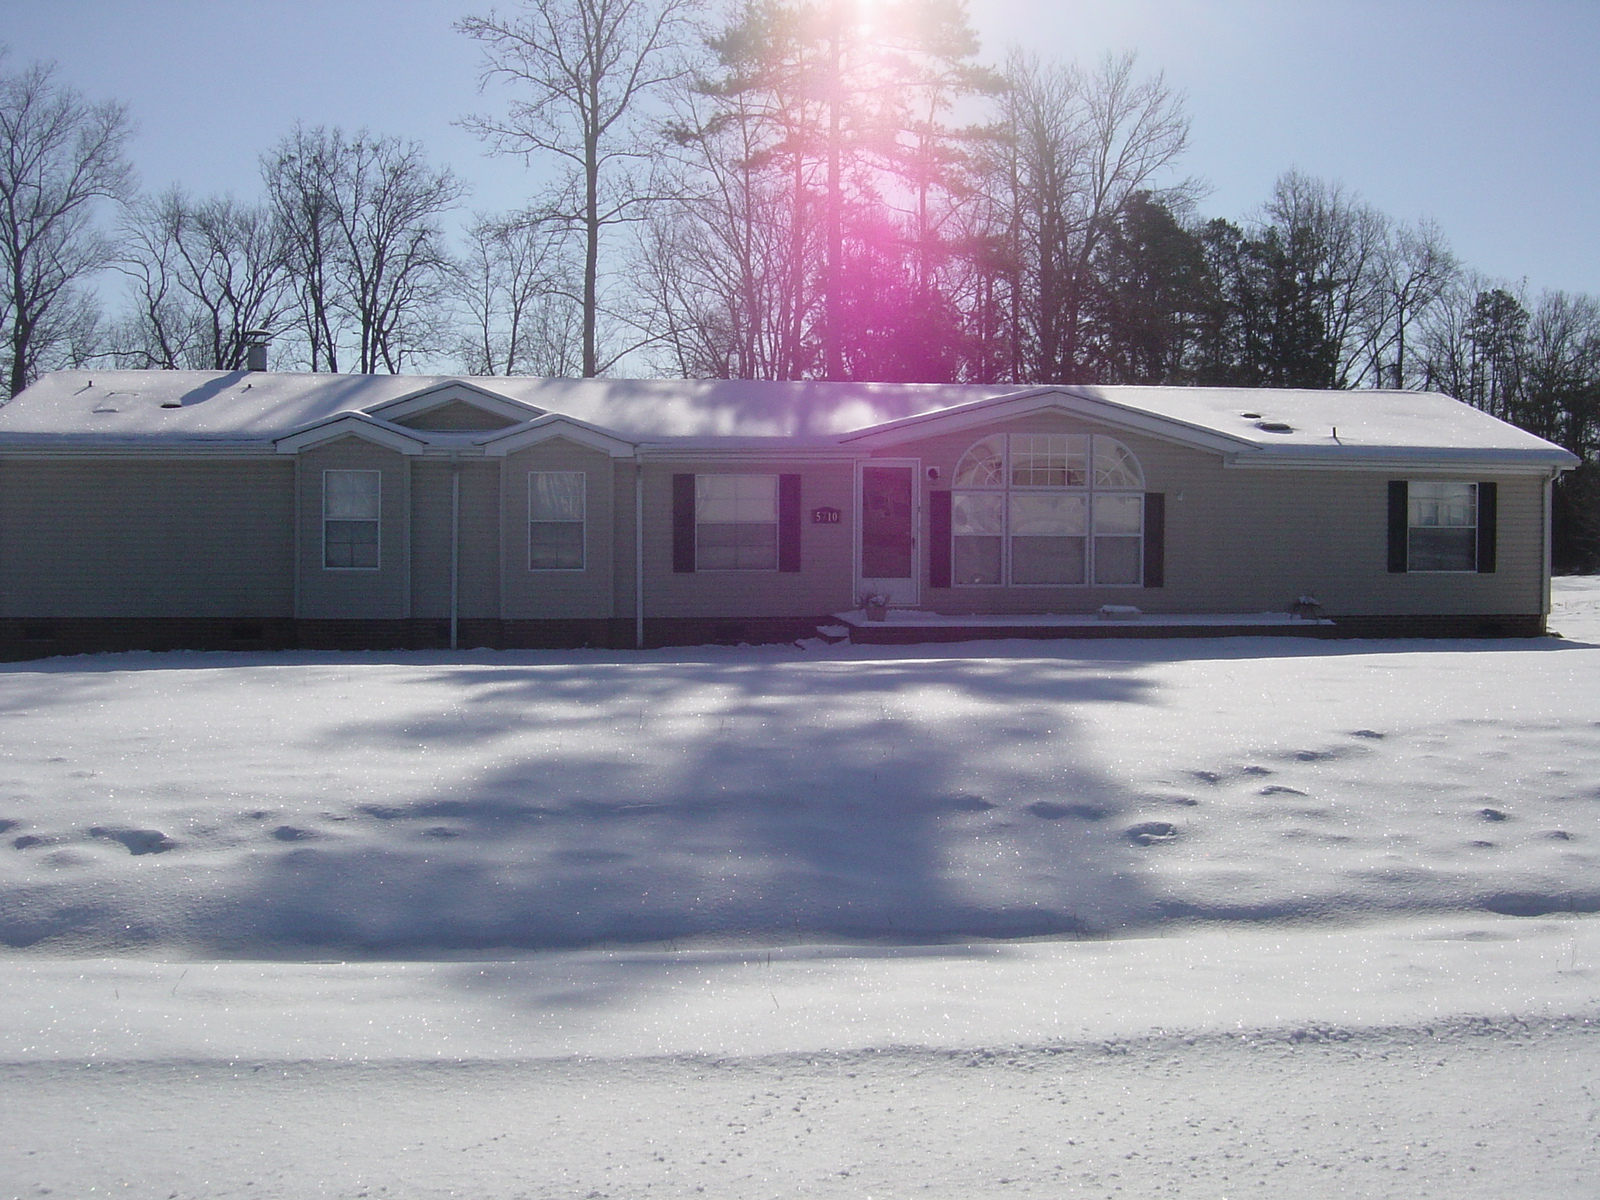
We Are Selling Our House!!!

This is our home and has been since December 2000.  We have made so many wonderful memories in this house.

Below is one of my favorite pictures of our home . . . in the snow!  We don't get a lot of snow here but, it reminds me of when I was growing up.  We always had snow every winter in NY.

 Click here for the real estate listing for our home.

We are selling our home in order to move into a home closer to town, work, church . . . well . . . everything really.  If you know anyone looking to buy, it is move in ready.  It has many desireable upgrades and many things are new.  Many things we did ourselves and are chronicled here on this blog.  Feel free to search the posts to see what was done.

Some features I would like to mention:

The roof is new (2009) with architechural shingles and new tempered glass skylights in the baths and kitchen.

The HVAC was completely replaced with an energy star rated unit (inside and outside units) in 2008

Monitored security system

Home Warranty to cover all systems and appliances

New Laminate (hard wood look) floors and baseboards in all the living areas and kitchen (2010)

Both baths have been remodeled with new sinks, fixtures, paint, subway tile, floors, lighting, mirrors, toilets

New lighting, flooring and cabinets in the mudroom/laundry room

All lighting has been updated throughout the house including outside fixtures

7 ceiling fans (1 in each of the 4 bedrooms, 1 in the office, one in the formal living room and 1 in the family room)

Wood burning stacked stone fireplace in family room (can be converted to gas logs)

Kitchen remodeled with glass tile backsplash, Brazilian granite countertops, new cabinet hardware, lighting, 10 foot long island and new over the range microwave

Gas range and either gas or electric dryer hookup

Water heater was replaced 2007

9'x23' front porch and 12'x12' back deck

Asphalt driveway and concrete sidewalk done in 2007

2079 sq ft home on a little over 1 acre
 
Mount Pleasant Schools (elementary, middle and high school)

Open concept living areas and kitchen

The rooms are as follows:

mud/laundry/utility room

Family room with fireplace

kitchen with huge island with seating

Formal dining room

Formal living room

Office

Master bedroom with master bath and huge walk in closet

3 other bedrooms and a full bath

Sunday, December 4, 2011

Photo Card

Classic Damask Frame Christmas
Personalize your Christmas card at Shutterfly.
View the entire collection of cards.